Sunday 22 June 2014

Benefit Gimme Brow

I haven't been posting much because I've been trying to do a no buy and don't have a lot to write about! But I got an email from Sephora saying I was only $25 away from becoming a VIB so I had to make a purchase. I'm surprised I haven't gotten to VIB sooner but I find I don't actually spend that much at Sephora. It's just a few staples and most other things I get from MAC or the drugstore.


Anyways, I thought I would get Gimme Brow for those days I don't feel like penciling in my brows. I do my brows on days I do a full face but just day to day and work days I don't do anything. If filling in my brows would be as easy as just brushing them out then maybe I would do them more. It claims to have fibers that adhere to the hair and skin to create the illusion of thicker brows. It's C$26 for a little 3g tube (like a sample sized mascara).


I got the lighter colour, light/medium. It only comes in 2 colours which is unfortunate because I feel that's not very universal. I find the light colour is even a little dark for me. I usually use the ash blonde Brow Wiz from Anastasia and this by comparison is darker. I bet a lot of fair people will find the light colour too dark. But it is still wearable for me and I really like how it looks. The tone is right in that it is an ashy/taupe colour as I find a lot of brow products are too warm.

This product also doubles as your brow gel. I have worn it by itself and in combination with the brow wiz as a brow gel. I don't wear brow gel ever so I'm not really used to having a gel in my brows but that feeling of having product in your brows does pass. Once it dries I don't really notice it. They don't feel or look crunchy but they do stay in place. I don't have very unruly brows so I can't really talk on the holding power but it does keep mine in place.

I don't know if this will be like mascara that starts off wet but dries up a bit with time because I find it quite wet right now. I have to be very careful putting it on because it some how ends up on the brow bone and above the brow. But if you use small strokes it's pretty easy to use. You can't carve out a nice shape like you could with a pencil, it's more just for filling it the natural shape of your brows. The brush is tiny, but still not precise enough for shaping. I hold it perpendicular for the arch and tail but still find it a bit tricky to fill them in without colouring outside the lines.

I don't really notice the whole fiber thing. I think that's just a marketing scheme. The brows just look thicker because they're coloured in, not because there's added fibers. The product does adhere to the skin, though, and not just the hair so it does give a more natural, full look. Up close it just looks like a pencil would.

This product is definitely not replacing my Anastasia brow wiz, but will use this in conjunction as a brow gel or on lazy days when I can just quickly brush them out to add some definition. I like this product but I don't think its necessary. If you are content filling in your brows I'd stick with your method. If your looking to save time in the morning and cut some corners, this is a very handle little product and would definitely recommend it.


Have you tried this product? Do you like it? Let me know.

Tuesday 10 June 2014

Birthday Makeup- Brown Smokey Eye

It was my birthday this past weekend and I chose to do a smokey brown look for my party. It was supposed to be a warm, reddish brown, but it ended up looking a bit more cool toned than anticipated. I still really liked the look though, so thought I would share!


I used makeup geek eyeshadows in creme brulee and cocoa bear in the creases, brown sugar on the lid, and mocha to darken the crease. I wasn't loving how it was looking so I added MAC pigment in Tan on the lid which really brought the whole look together.


I lined the top with black liner and lined the bottom lash line with MAC costa riche and smoked it out with cocoa bear. I skipped false lashes but they would look great with the look.

The lips is my fav nude combo right now, MAC creme d'nude with Bonnebell liplites in strawberry parfait.


Monday 2 June 2014

PSA: 40% off all Shoes at Target!

All women's shoes at Target are 40% off until Thursday June 5th. 

I just happened to be strolling by looking for cookies when I saw this. The shoes at target are already cheap, so they were super cheap! It's a good time to pick up some sandals and flip flops.

I got two pairs of wedges and some sandals, all for $50. So amazing. 


Sam and Libby, $14.99 (many colours available)


Mossimo, $17.99 (available in tan and black)


Mossimo, $17.99 (available in beige)


That is all. Now go by some shoes

Sunday 1 June 2014

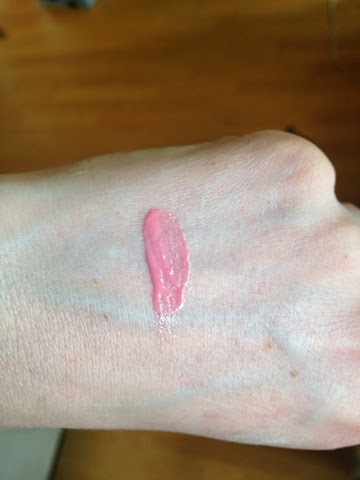
Bonnebell Liplites - Strawberry Parfait

This lipgloss is supposed to be a dupe for Nars Turkish Delight. Everyone is always raving about it, especially because it's so cheap. So when I stopped by a Walmart I picked one up.


I don't own or have never tried Nars Turkish delight so I can't do a full comparison. All I can say is that this is deffinately a cheap lipgloss and I can't imagine Nars making anything this bad. I'm hoping the only reason this is popular is because of the colour, because the formula sucks. I had to put on like 4 layers until it did anything. It's just very thin and not very glossy. The colour by itself is nothing special, pretty sheer. It just pales the lips out a little bit without adding much colour.


It is really nice over top of lipsticks though. I like wearing it over nude lipsticks to add a bit of colour so the lips aren't so washed out when I do a darker eye look. I don't have a light pink gloss for this purpose, so that's really why I got it. It can be worn over any colour. I've been liking it over pale nudes and more brown nudes like MACs viva glam V to make it less brown.

And it wasn't even all that cheap! I think I paid either $6.99 or $7.99. I know that it's cheap compared to Nars but for a brand like Bonnebell with a formula that feels like 99 cents, I think it was over priced! I've heard of people getting it for like $2 in the states which is more in line with the quality.

The best part? It tastes really good! Like watermelon. Deff my fav part.

I know it seems like I gave this a harsh review but I've actually been wearing it like everyday so I think I like it more than I think. It's just a very simple, versatile lipgloss. 


Have you tried this lipgloss? Do you love it?

Friday 30 May 2014

Maleficent Inspired Make Up

Sleeping Beauty was always my favourite Disney Movie. But I also had an intense irrational fear of Maleficent. So she's obviously my fav Disney villain now. I was super excited when I heard they were making a live action of Maleficent and I'm going to go see it tonight. I decided to go out in full Maleficent makeup tonight to see it.

There have actually been a lot of Maleficent tutorials out recently but I found they have been more the Angelina Jolie Maleficent look which is more of a wearable look with brown shadows, red lipstick, and a sharp contour. I wanted to do a throw back to the original cartoon one. No green face, but close enough. This is meant to be a costume look, not a pretty look. I did the same colourful shadow she has, with a contour, and the red lipstick, and arched eyebrow.


My inspiration pic


Are you going to be doing a Maleficent inspired look?


Monday 19 May 2014

Subtle Smokey Eye with a Pop of Colour

So I was thinking of making this a Prom look but I think it's a bit late for most people. So I'll just call it a special occasion look. I couldn't decide between a classic smokey eye or a colourful smokey eye, so I combined the two. It's a smokey eye but without being all over dark so it still has some brightness to it. You could easily customize it to your preferences. You could deepen the black, add thin or thick liner, wing the liner, skip the colour and just add black to the bottom, or keep it more subtle and just add some soft brown on the bottom. You could also match the colour on the bottom lash line to match the colour of your dress. This is just what I chose to do because I wore the look for a concert, so I thought it was kind of fun!

I need a bang trim!


I started with Urban Decay primer potion all over both lids then put some NYX Jumbo eye pencil in Milk on just the inner 2/3 of the eye to make the lighter colour pop.

Then using a fluffy blending brush (Sigma E40) I put on some Makeup Geek Peach Smoothie as a transition shade. This colour is very close to my skin tone so it's more to just help blend. Then using a blending brush I added some MUG creme brulee to deepen it a bit.


To keep the look bright I put MUG shimma shimma on the inner 2/3 of the lid. You could also dampen your brush and really pack it on to make it brighter or more metallic. I put some on the inner tear duct as well and highlighted the brow bone with MUG Vanilla.

I used the black shade, corrupt on the outer 2/3 of the lash line (stopping around where the inner iris is) and slowly blended upwards in a triangle shape, going wider towards the outer edge. To keep the look soft I skipped eyeliner, but you could easily add it for more intensity. You can build the black up more. I went in about 4 times to create some more intensity, but a lot of colour gets blended away. I put on my concealer after doing my eyes because there was some fall out from the black. I used a tissue with makeup remover and swiped under the eyes and up towards the tip of my eyebrow which created a soft cat eye look with the shadow (I find easier and less harsh than the tape method). A lot of the shimma shimma got blended away too, so I went back in to brighten that.


With nothing on the bottom lash line. Could just leave it like this with some soft brown on the bottom for a simpler look


The lower lash line is where you can really customize the look. I chose purple because I like it with brown eyes, but you could use any colour. I used the rimmel kohl liner in the dark purple colour along the water liner and lash line and just smudged it out with my finger. I then added MUG eyeshadow in Sensuous to the lash line and blended everything out with MUG Wisteria.


I finished the look with wispy eyelashes. I just picked these up at Forever 21 for $1! It's my first time using them and they applied very easily. I found them quite long so I had to cut a few millimetres off so they fit. If it's a special occasion where you will have photos taken, I would go for more dramatic lashes though. These didn't do a whole lot.


For the lips I used MAC Creme d'nude lipstick with Bonnebell Liplites in Strawberry Parfait on top.


The rest of my face:

Benefit The Porefessional
Estee Lauder Double Wear Foundation
MAC Pro Longwear Concealer
MAC Studio Fix Concealer
MAC MSF Natural
NARS Laguna
Coastal Scents Blush (From the palette, don't know the name)
MAC MSF in Perfect Topping
L'Oreal Voluminous Carbon Black Mascara
Anastasia Brow Wiz in Ash Blonde


                                             What is your favourite, fun, special occasion look?

Wednesday 14 May 2014

Shampoo and Conditioner For Copper Hair

I got some new products at the salon when I dyed my hair copper. I don't usually buy expensive hair products because there's good stuff at the drug store for cheap, but these are more unique products and I haven't found anything like them at the drug store.


Aveda Madder Root- I only got this in the conditioner but it also comes with the shampoo. My stylist said between the two, the conditioner is more pigmented so I just got it. This is a colour depositing conditioner, not a toner. It actually puts colour into your hair so your dye job lasts longer. I find that it lasts for about 2 shampoos so I use it about every 3rd shampoo or when I want some more red. It is very red and very pigmented. I didn't like this at first because it's the wrong shade. It is very red when I want my hair to be copper. It was also very blotchy. I would have chucks and streaks of red in my hair that would take a few shampoos to fade. I tried applying it evenly and combing through it but it still came out blotchy. I have since learned to just mix a little in with my conditioner. I use about 2/3 conditioner with 1/3 of the madder root, if not less. This dilutes it enough that its not as dark red and applies more evenly in the hair. And best of all it makes it last longer because it's quite pricey.


$35 for 250mls


Davines Alchemic Shampoo/Conditioner- I just recently got this shampoo and conditioner from my salon when I got my hair done. My stylist recommended this for my copper hair to keep the colour bright because she too found out (the hard way) that colour depositing products are streaky in my hair. This shampoo/conditioner is not colour depositing but just brightening. I don't know if it's true, but my stylist said you have to use the two products together. I love that its actually copper coloured and not red. Most toning shampoos/conditioners at the drug store are red or pink coloured. This shampoo is more yellow and the conditioner is copper. The shampoo doesn't lather a lot so I use 1/2 as much as usual in two separate shampoos because I find the second time lathers more and gets my hair cleaner. The conditioner is very thick and I don't need to use as much as I would with my drug store conditioners. It leaves my hair feeling nice and silky. It does brighten the colour and makes it look more copper. This saves time going to the salon for a toner every few weeks. The only downside is it smells like baby powder. I hate baby powder scented products. Why would I want to smell like a baby butt?! Apart from the smell and price, I really like this toning shampoo/conditioner for keeping my colour bright. This also comes in silver, golden, tobacco, red, and chocolate.


Shampoo $23 for 280mls and Conditioner $30 for 250mls (I think that's about what I paid, can't remember exactly)